Getting Started with DataSQRL
Basic DataSQRL Agent
The basic DataSQRL agent runs as a Docker image on your local machine. It wraps the Pi coding agent with the DataSQRL framework, an AGENTS.md file, and skills.
All you need is a recent version of Docker and an API key from the LLM provider you'd like to use. If you don't have an API key or want to see how the agent works step-by-step, follow this tutorial instead.
- macOS
- Windows
- Linux
docker run -it --rm --detach-keys="ctrl-],ctrl-]" \
  -e ANTHROPIC_API_KEY \
  -e TERM \
  -e COLORTERM \
  -v "$PWD":/workspace \
  -w /workspace \
  datasqrl/core-agent
# Run in PowerShell
docker run -it --rm --detach-keys="ctrl-],ctrl-]" `
  -e ANTHROPIC_API_KEY `
  -e TERM `
  -e COLORTERM `
  -v "${PWD}:/workspace" `
  -w /workspace `
  datasqrl/core-agent
docker run -it --rm --detach-keys="ctrl-],ctrl-]" \
  -e ANTHROPIC_API_KEY \
  -e TERM \
  -e COLORTERM \
  -v "$PWD":/workspace \
  -w /workspace \
  datasqrl/core-agent
Run the command above in your terminal. To use a different model provider, replace -e ANTHROPIC_API_KEY with the environment variables for that provider:
- Anthropic:
-e ANTHROPIC_API_KEY - OpenAI:
-e OPENAI_API_KEY - Amazon Bedrock:
-e AWS_BEARER_TOKEN_BEDROCK -e AWS_REGION=us-west-2 - Azure OpenAI:
-e AZURE_OPENAI_API_KEY -e AZURE_OPENAI_BASE_URL=https://your-resource.openai.azure.com - Google Vertex AI:
-e GOOGLE_CLOUD_PROJECT=your-project -e GOOGLE_CLOUD_LOCATION=us-central1 -e GOOGLE_APPLICATION_CREDENTIALS=/secrets/gcp.json -v /path/to/key.json:/secrets/gcp.json:ro
Passing -e ANTHROPIC_API_KEY without a value copies the variable from your current terminal session. To set the value explicitly, use:
-e ANTHROPIC_API_KEY=sk-xyzxyz
Once the Pi terminal is running, give the coding agent a prompt like:
Build a pipeline that ingests our order data from Kafka in real time and serves hourly revenue per product through an API.
The agent README on GitHub shows how to customize the basic agent to use a different coding agent, skills, AGENTS.md, and more.
Advanced DataSQRL Agent
You can also run DataSQRL as a sub-agent with planning mode, iterative improvement, and deployment workflows. It plugs into your existing coding agent and GitHub to act as your data engineering sidekick.
Install the DataSQRL plugin, describe the pipeline you want in plain English, review the plan, and let the DataSQRL agent build it. The DataSQRL agent implements, compiles, tests, verifies, and refines the pipeline until the tests pass. It is more thorough and complete than the basic agent but takes more time and resources to run.
Prerequisites
- Docker, installed and running locally. The agent image is fetched automatically on first use, so there is no manual
docker pull.- macOS and Windows: Docker Desktop
- Linux: use your package manager, e.g.
sudo apt install docker.io - Verify with
docker --version
- An Anthropic credential: either an
ANTHROPIC_API_KEYenvironment variable or aclaude loginsubscription. The plugin discovers either one automatically. - A git repository for your project. The repository is mounted read-only so the agent can discover sibling projects and shared data catalogs. Your project folder is the only place it writes to.
- A bash shell. On Windows, use WSL. Git Bash is not enough to run the containerized agent.
- A coding agent: Claude Code, Codex, Cursor, or GitHub Copilot.
Install the Plugin
- Claude Code
- Codex
- Cursor
- GitHub Copilot
Run these commands inside Claude Code:
/plugin marketplace add DataSQRL/datasqrl-plugin
/plugin install datasqrl@datasqrl
codex plugin marketplace add DataSQRL/datasqrl-plugin
Point Cursor at the DataSQRL/datasqrl-plugin repository. The plugin manifest is at the repository root.
Copilot has no plugin system. It reads skills from directories inside the repository you are working in. Clone the plugin repository and run the installer against your project:
git clone https://github.com/DataSQRL/datasqrl-plugin
./datasqrl-plugin/install-skills.sh /path/to/your/repo
This copies the skills into .github/skills/ and .agents/skills/. The skills call codeagent.sh by name, so it must be on your PATH. The installer tells you how to set that up.
Build Your First Pipeline
1. Describe what you need
In your project repository, tell your coding agent what you want to build in plain English:
Build a pipeline that ingests our order data from Kafka in real time and serves hourly revenue per product through an API.
You rarely need to type a skill command. When you describe pipeline work, the DataSQRL workflow starts on its own. In Claude Code, you can also start it explicitly with /datasqrl:start.
2. Agree on the requirements
Your agent asks clarifying questions about sources, payloads, entities, time semantics, transformations, the API surface, and test data. It then writes a requirements document to adr/requirements_<ts>.md. Review it and correct anything that is wrong. Precise requirements produce a better pipeline.
3. Review the plan
The DataSQRL agent turns the requirements into a checkbox-tracked plan at adr/plan_<ts>.md. Read through it. This is the point where you steer the design, before anything is built. Ask for changes, or tell your agent the plan looks good to proceed.
4. Let the agent implement
Once you approve the plan, the DataSQRL agent runs the full implement → compile → test → verify → refine loop. An implementation run takes 30–60+ minutes, so it runs detached:
- The run belongs to Docker, not to your session. You can close the session, interrupt your agent, or restart your editor, and the run still finishes.
- The launch prints a
tail -fcommand you can run in another terminal to follow the agent's progress live. - Your agent waits for the run in the background and reports the result when it ends.
- Ask your agent at any time whether the run is still going, what its output means, or to stop it (
/datasqrl:progress). This works from any session, even one that did not start the run. - Only one run at a time is allowed per project, so two agents never edit the same files. Different projects can run in parallel.
5. Review the result
When the run finishes, your project contains the SQRL scripts, their tests, and the package configuration. Read the scripts. The whole pipeline, from ingest to API, is expressed in SQL.
Compiling the project also writes files for inspection to the build directory:
pipeline_visual.html: an interactive view of the pipeline DAG. Click a node to see its schema, logical plan, and physical plan.pipeline_explain.txt: a text version of the DAG with table types, keys, timestamps, and engine assignments.deploy/plan: the deployment assets, including Flink plans, Kafka topics, Postgres schemas, and API definitions.
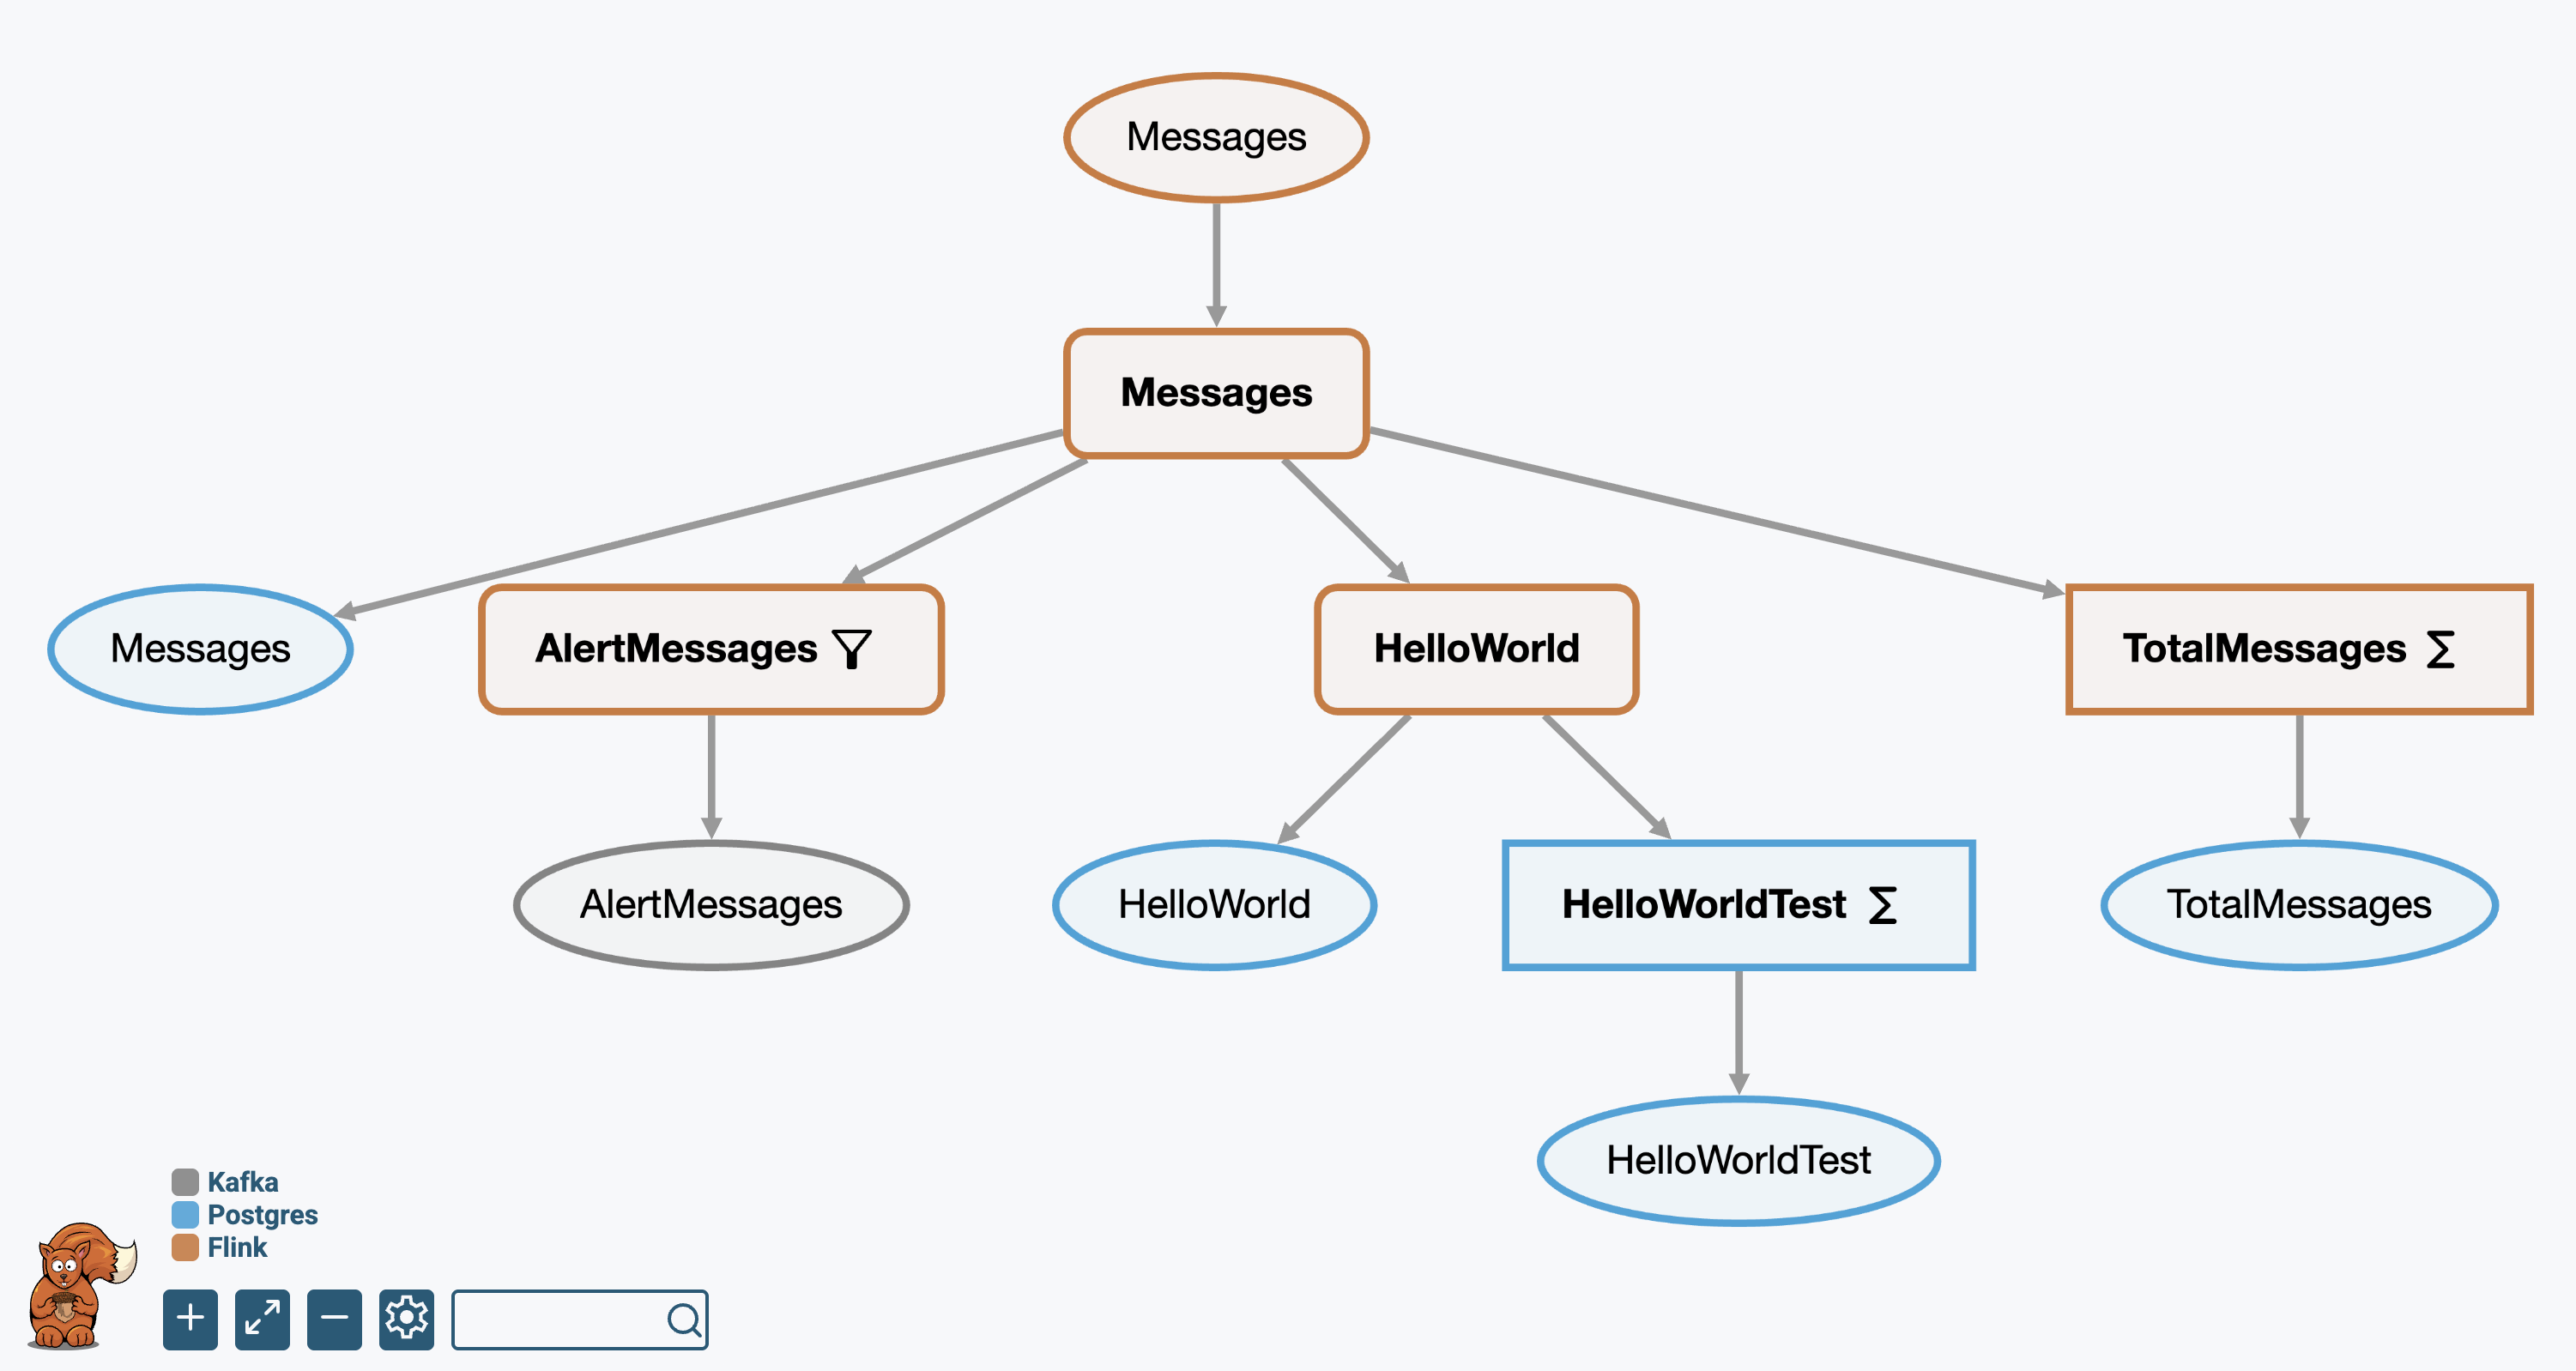
To run the pipeline and its API locally, use the run command. The API is then available at http://localhost:8888/v1/graphiql/, and via REST and MCP.
Make Changes
For a small, well-scoped change to an existing project, you don't need the full requirements and planning workflow. Ask your agent for a patch (/datasqrl:patch in Claude Code). It sends the request straight to the implementing agent, which makes the change, updates the affected tests and documentation, and runs the tests until they pass.
Add an endpoint that returns the total order count and the timestamp of the most recent order.
For larger changes, describe them like a new pipeline and go through requirements and planning again.
Deploy
To your own infrastructure: compile the deployment assets and deploy them to Kubernetes or managed cloud services:
docker run --rm -v $PWD:/workspace datasqrl/cmd compile myproject-shared-package.json myproject-prod-package.json
Replace myproject with your project's name. Pass the shared base configuration first and the environment overlay second. Later files override earlier ones, as explained in the configuration documentation. See the compiler documentation for details.
To DataSQRL Cloud: ask your agent to deploy (/datasqrl:deploy). Deployment is always a separate request, never the tail end of an implementation run. It deploys a commit from GitHub, not your working tree, so commit and push first. You also need:
curlandjqon yourPATH- A DataSQRL Cloud account with the Member or Owner role, and the project already created and linked to your GitHub repository
- A browser to approve the sign-in, at most once per session
Deploying adds a new deployment without changing which one the project serves. To make it the main deployment, ask your agent to promote it (/datasqrl:promote) once you have seen the deployment succeed.
Troubleshooting
- Mount or path errors on Windows: run the agent from WSL. Git Bash rewrites the Docker mount paths.
- An implementation is refused: another run is already in progress for this project. Ask your agent about its progress, or to stop it.
- Ports already in use when running locally: check whether ports 8888 or 8081 are used by another application.
Next Steps
- Example Projects: self-contained data products and APIs built with DataSQRL
- SQRL Language Reference: how to read and review the SQL the agent produces
- Plugin Documentation: the full reference for the DataSQRL plugin
- Harness Architecture: the design behind DataSQRL